
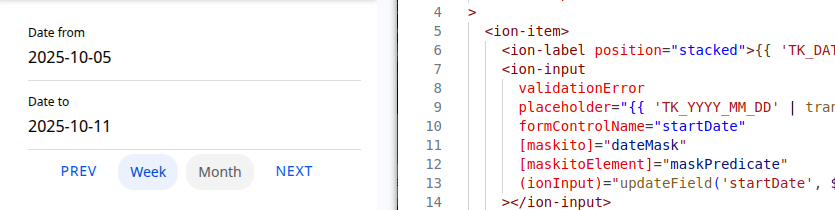
Version 0.4.0 of TrackLab is still in development, and I want to share what I’ve been working on over the last few days. The most time-consuming part was creating a custom input elements.
I use Angular (v20) + Ionic (v8.7) for my project, but the example below should also work with pure Angular if you replace Ionic-specific elements (like <ion-input>) with standard HTML ones (like <input>).
When I was creating new custom elements, there were a few nuances.
First, one of my input components consists of several fields. It’s an input for periods with a start date and an end date.
Second, I had already set up validations for those fields using my own directive validationError, and I wanted to keep that logic inside the new element.
That’s why I decided to use a form inside the component. I know that I could have used a nested form and defined a FormGroup in the parent form, but I don’t like that approach because it requires additional setup every time the component is used.
Starting point
I began with a simple form that I wanted to extract into a separate component. For brevity, I’ve removed some parts like translations, masks, and other unrelated code.
<form [formGroup]="filterForm">
  <ion-item>
    <ion-label position="stacked">Date from</ion-label>
    <ion-input
      validationError
      formControlName="startDate"
    ></ion-input>
  </ion-item>

  <ion-item>
    <ion-label position="stacked">Date to</ion-label>
    <ion-input
      validationError
      formControlName="endDate"
    ></ion-input>
  </ion-item>
</form>

<div class="controls">
  <ion-button (click)="shiftDates(-1)">Prev</ion-button>
  <ion-chip (click)="selectPeriod('week')">Week</ion-chip>
  <ion-chip (click)="selectPeriod('month')">Month</ion-chip>
  <ion-button (click)="shiftDates(1)">Next</ion-button>
</div>In the component:
constructor(private formBuilder: FormBuilder) {
  this.filterForm = this.formBuilder.group(
    {
      startDate: ['', [Validators.required]],
      endDate: ['', [Validators.required]],
    },
  );
}My goal was to move everything into a reusable component with minimal changes.
Creating a new component
Next step – create a new component.
ng g component components/date-period-inputFor it to behave like a standard input, it needs to implement the ControlValueAccessor interface and provide the NG_VALUE_ACCESSOR token.
import { Component, forwardRef } from '@angular/core';
import { ControlValueAccessor, FormBuilder, FormGroup, FormsModule, NG_VALUE_ACCESSOR, ReactiveFormsModule, Validators } from '@angular/forms';
import { IonInput, IonLabel, IonItem, IonButton, IonChip } from '@ionic/angular/standalone';

export type DatePeriod = {
  startDate: string;
  endDate: string;
};

@Component({
  selector: 'app-date-period-input',
  templateUrl: './date-period-input.component.html',
  imports: [IonChip, IonButton, IonItem, IonLabel, IonInput, FormsModule, ReactiveFormsModule],
  providers: [{
    provide: NG_VALUE_ACCESSOR,
    useExisting: forwardRef(() => DatePeriodInputComponent),
    multi: true,
  }],
})
export class DatePeriodInputComponent implements ControlValueAccessor {
  public form: FormGroup;
  private onChange = (_: any) => { };
  private onTouched = () => { };

  constructor(private formBuilder: FormBuilder) {
    this.form = this.formBuilder.group({
      startDate: ['', [Validators.required]],
      endDate: ['', [Validators.required]],
    });
  }

  writeValue(value: DatePeriod): void {
    if (value) {
      this.form.patchValue(value);
    } else {
      this.form.patchValue({ startDate: '', endDate: '' });
    }
  }

  registerOnChange(fn: any): void {
    this.onChange = fn;
  }

  registerOnTouched(fn: any): void {
    this.onTouched = fn;
  }
}
To implement ControlValueAccessor, you must add the following methods:
writeValueregisterOnChangeregisterOnTouched
The main method here is writeValue(), which runs every time someone (or something) tries to set a new value for the input.
Testing the component
To test the custom input, create a parent form that includes it.
<form [formGroup]="filterForm">
    <app-date-period-input
      formControlName="datePeriod"
    ></app-date-period-input>
</form>

<ion-button (click)="test()">Test</ion-button>@Component({
selector: 'app-some-page',
templateUrl: './some-page.page.html',
imports: [DatePeriodInputComponent], // <-- don't forget to import
})
export class LibraryItemStatsPage implements OnInit {
public filterForm: FormGroup;
constructor(
private formBuilder: FormBuilder,
) {
this.filterForm = this.formBuilder.group({
datePeriod: [],
});
}
test() {
console.log(this.filterForm.value);
}
}For now, when you press the button you will always see:
{
  datePeriod: null
}How to make it work?
To make the input actually work, you need to update its value whenever the user interacts with it. It can happen by typing or by clicking control buttons.
For manual input, update the value on the ionInput (or onInput) event.
<ion-input
  validationError
  formControlName="startDate"
  (ionInput)="updateValue()"
></ion-input>

<!-- ... -->

<ion-input
  validationError
  formControlName="endDate"
  (ionInput)="updateValue()"
></ion-input>updateValue() {
this.onChange(this.form.value);
this.onTouched();
}After these changes, you’ll start receiving proper values in the parent form.
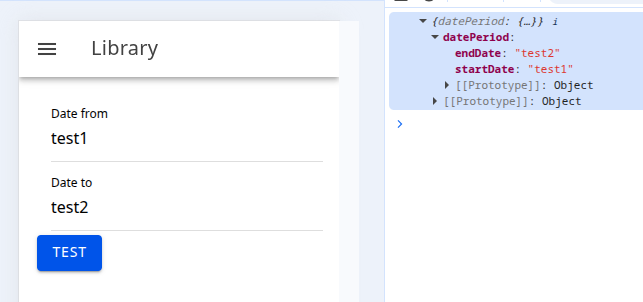
For button clicks, use form.patchValue() and then call updateValue().
patchAndUpdate(value: DatePeriod) {
    this.form.patchValue(value);
    this.updateValue();
}

selectPeriod(periodName: string) {
  // some logic

  this.patchAndUpdate(result);
}

shiftDates(shiftDirection: number) {
  // some logic

  this.patchAndUpdate(result);
}Validations
As I mentioned earlier, one of the reasons for keeping the form inside the component was to handle validations properly.
To achieve this, I implemented the Validator interface. This allows me to pass all validation errors from the inner form up to the parent form.
@Component({
  // ...
  providers: [
    // ...
    {
      provide: NG_VALIDATORS,
      multi: true,
      useExisting: DatePeriodInputComponent
    },
  ],
})
export class DatePeriodInputComponent implements ControlValueAccessor, Validator {
  // ...
  validate(control: AbstractControl): ValidationErrors | null {
    if (!this.form.valid) {
      return Object.values(this.form.controls)
        .reduce((result, curr) => ({
          ...result,
          ...curr.errors,
        }), {});
    }

    return null;
  }
}Conclusion
The final result will look like this:

Now, the custom input can be used anywhere as a regular form control –
no need to manually set up a FormGroup or validation rules each time.
Sources
https://blog.angular-university.io/angular-custom-form-controls